Skip to content
1940 East Hebron Parkway, Carrollton, TX 75007
call
Call For an Appointment 972-394-8989
menu
clear
Facebook
Home
About Us
Meet Dr. Thames
Meet The Team
Office Tour
Invisalign
Braces
Treatments
Elastics
Retainers
Orthodontics and Surgery
FAQ
Patient Information
New Patient Form
The Personal Benefits of Orthodontics
Your Child’s First Orthodontic Check-Up
Adult Orthodontics
The Importance of Clean Teeth
Partnership: You, Your Orthodontist and Your Dentist
For a Smile That’s Good For Life
Problems
Contact Us
Request Appointment
Home
/
Before and After
/
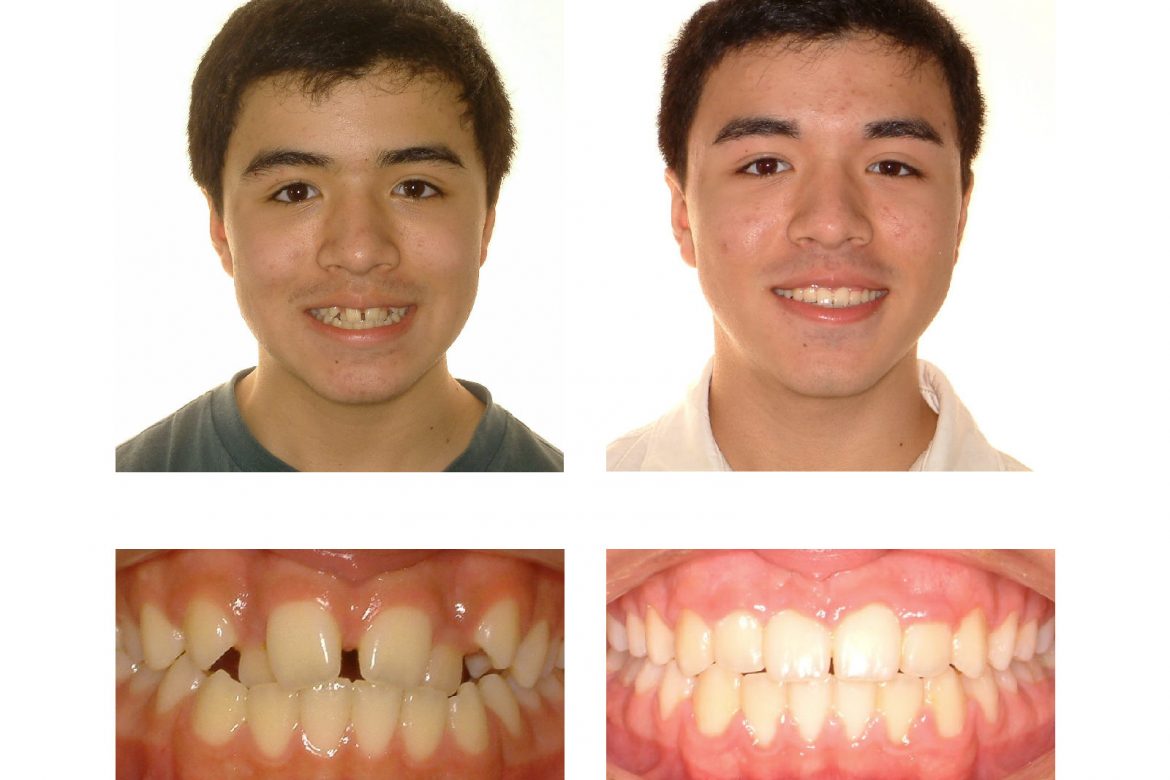
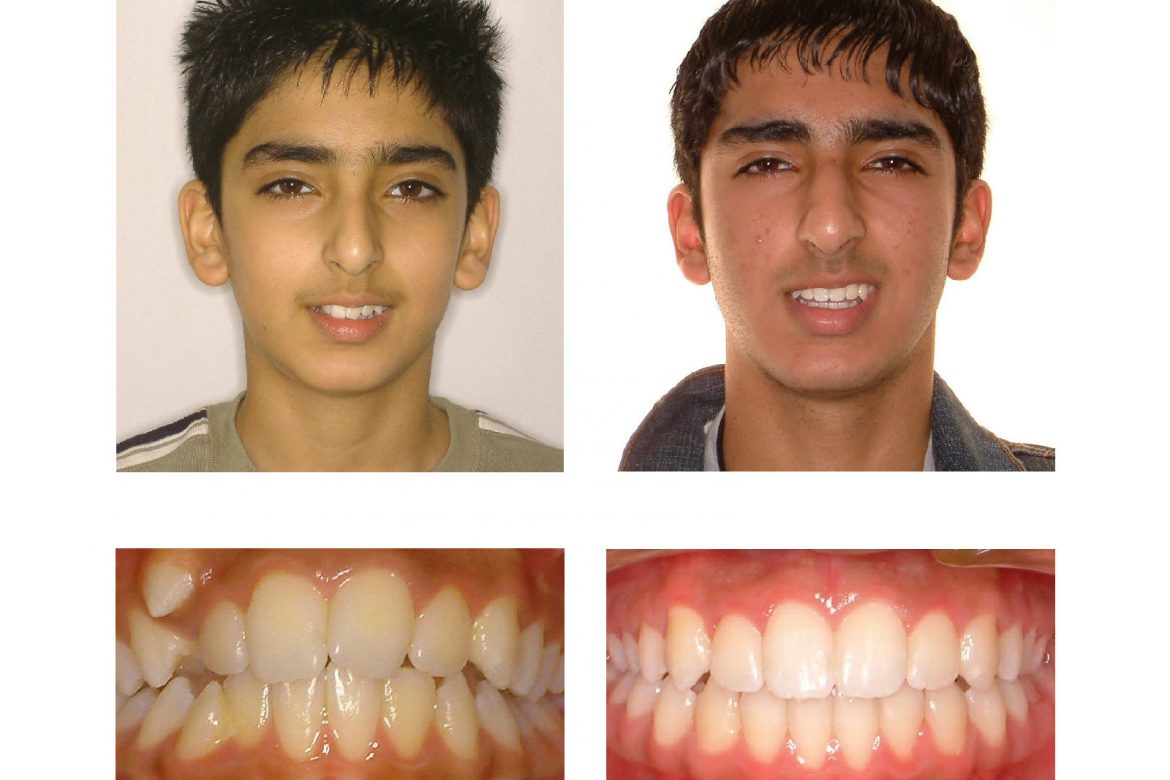
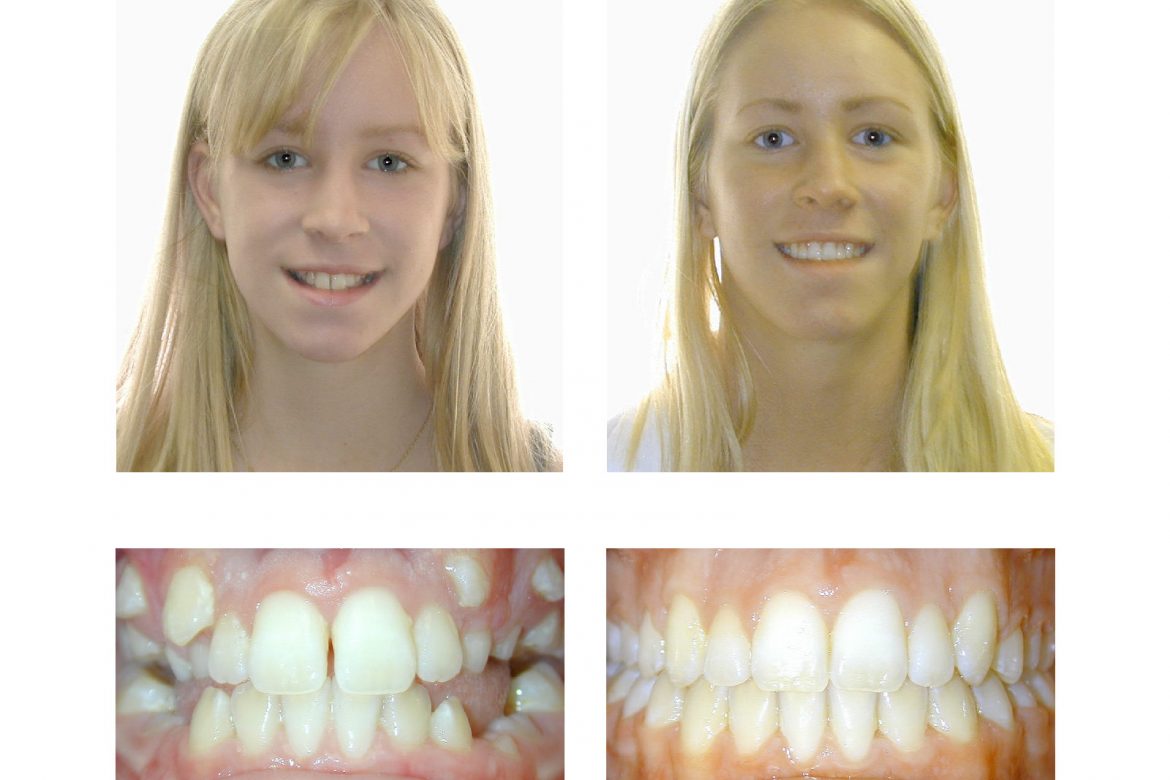
Crowding Nonextraction Gallery
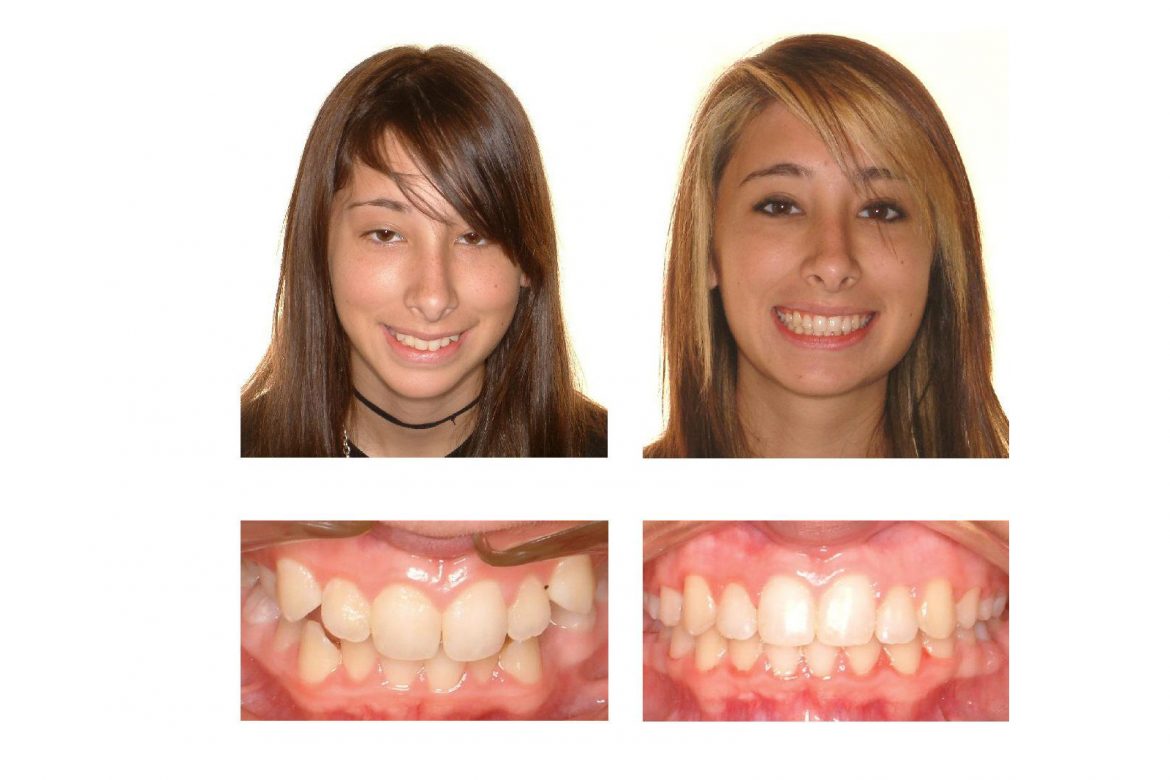
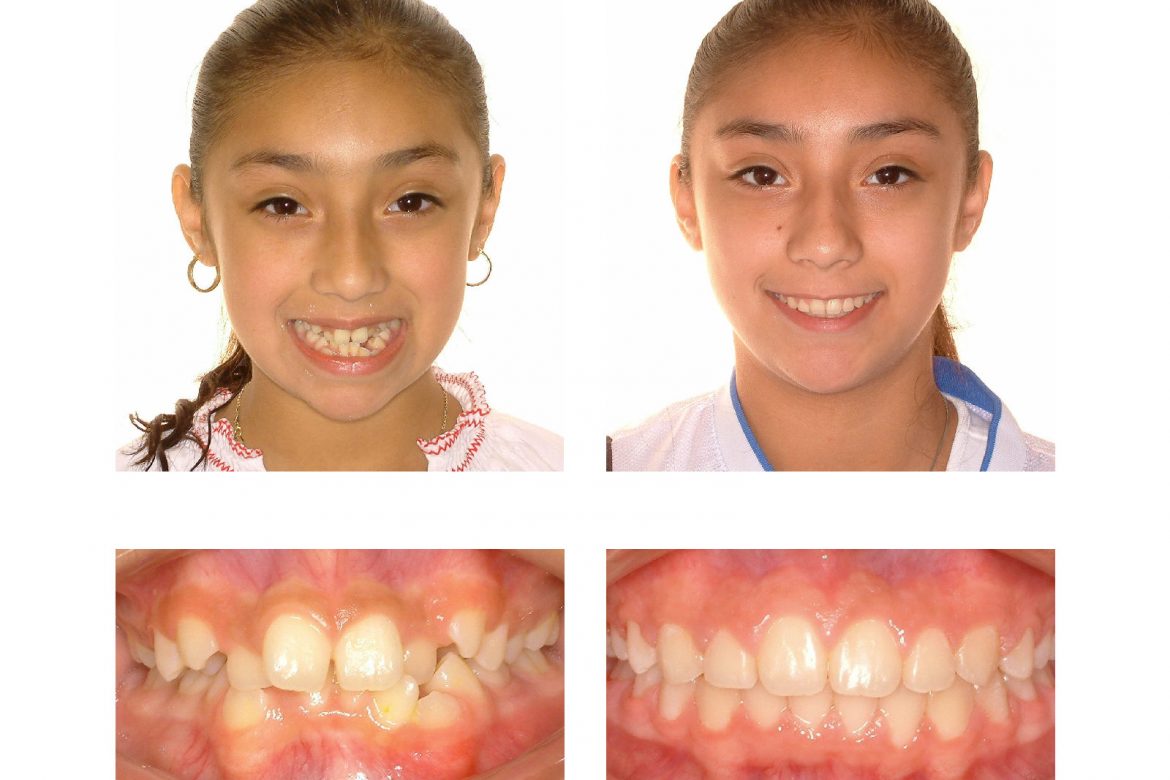
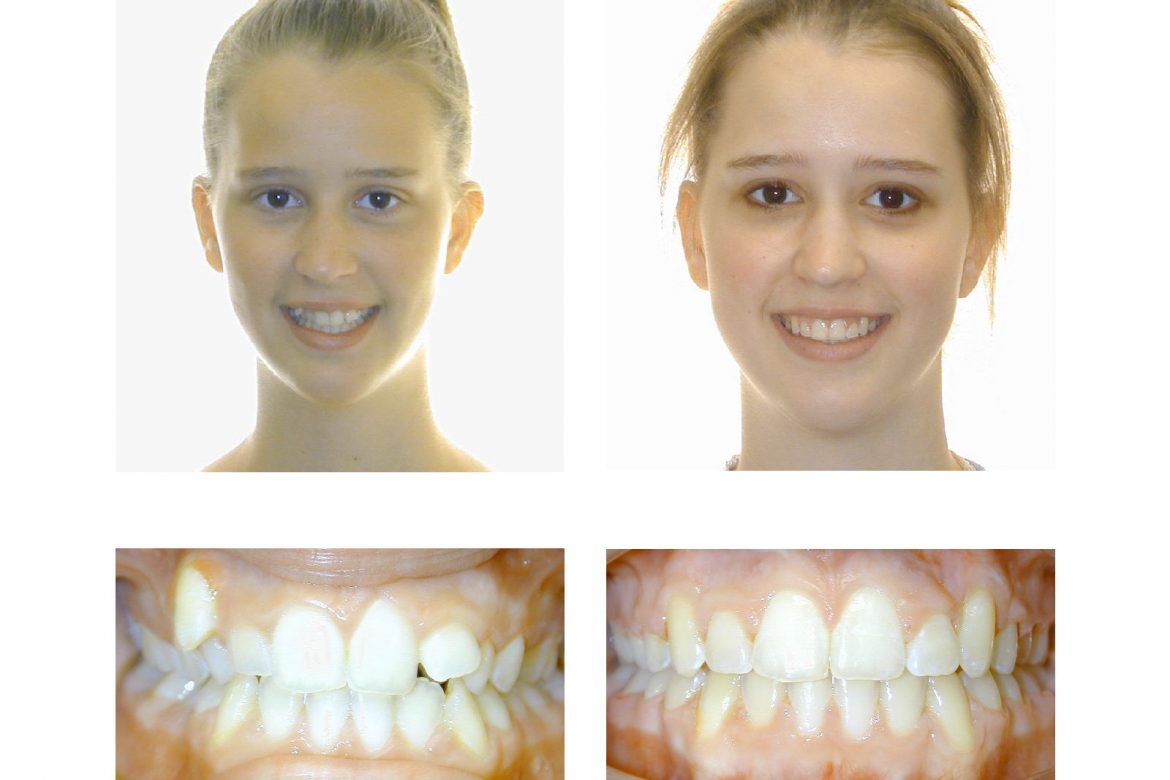
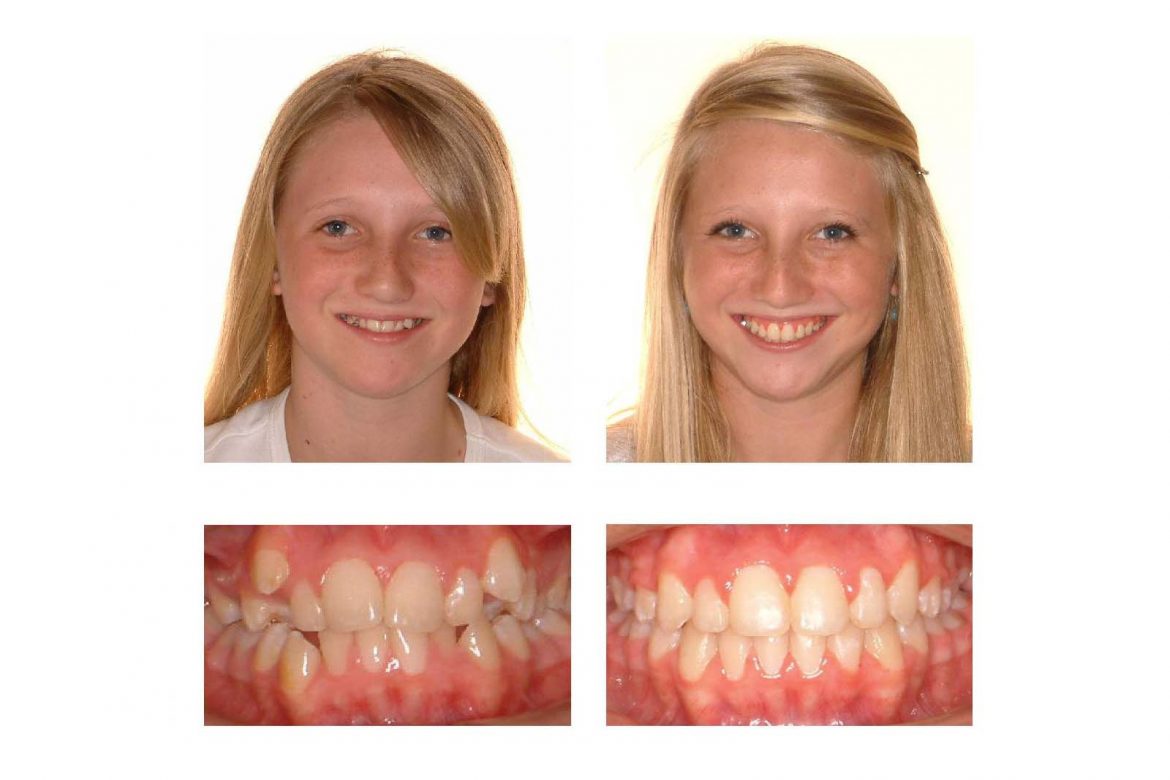
Crowding Nonextraction Gallery
navigate_before
navigate_next